텍스트 → 이미지일러스트스타일 가이드
연필 한 자루 · 축 방향 단축법
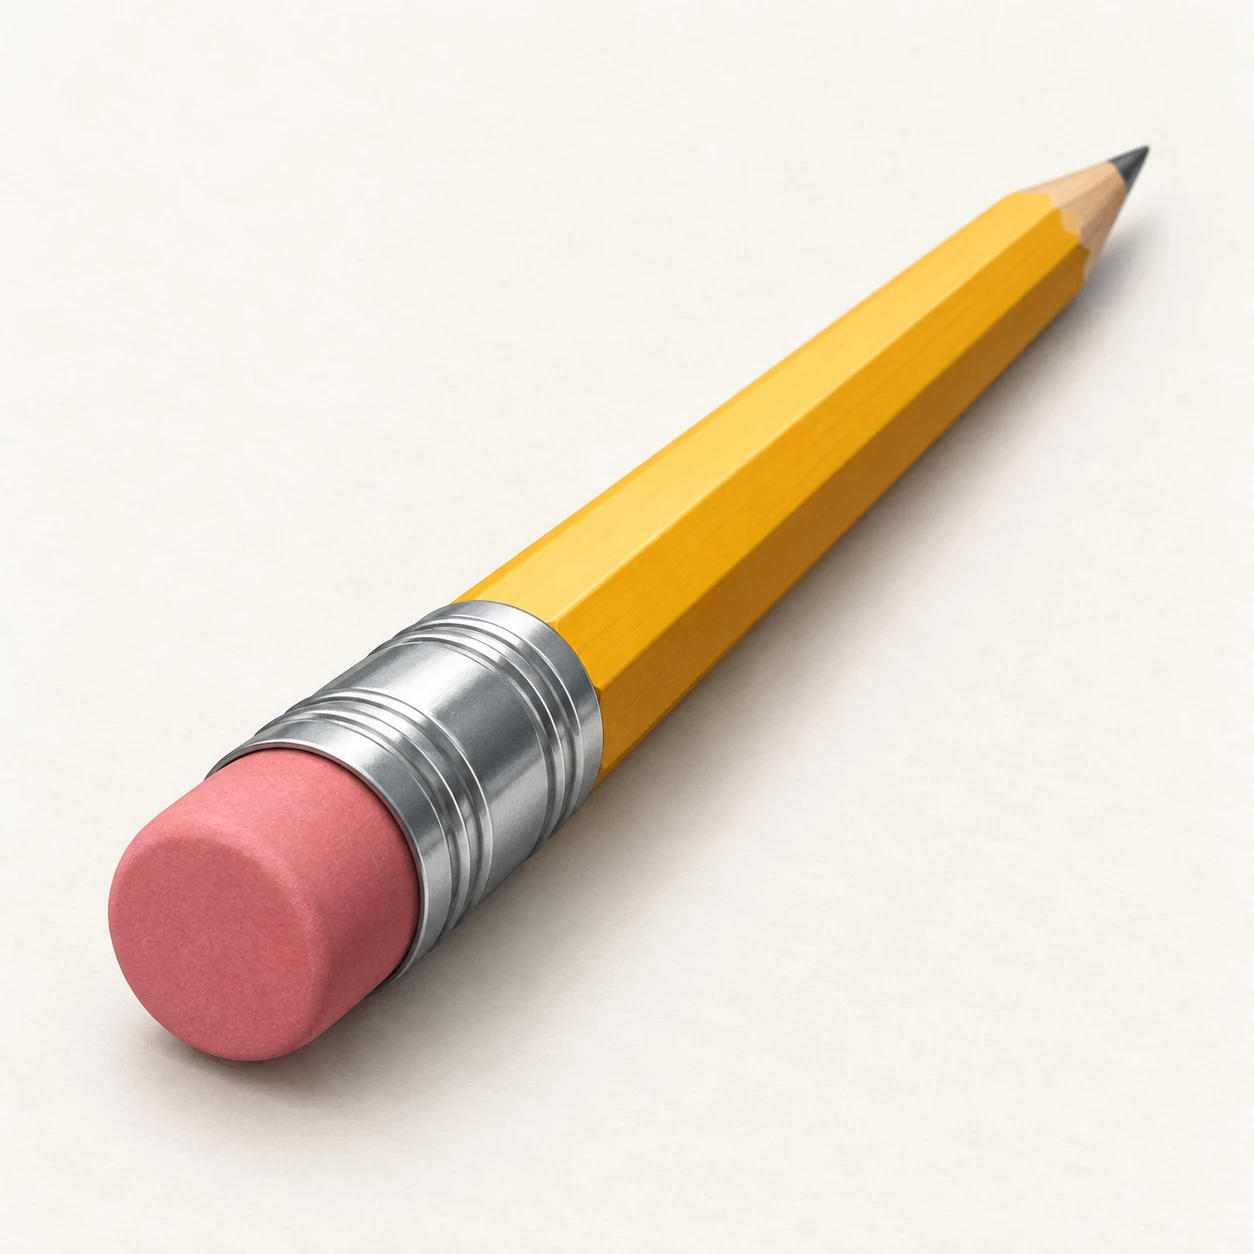
가까운 지우개 끝을 크게, 먼 흑연 끝을 작게 그려 짧은 화면 길이 안에서도 연필의 깊이와 방향을 보여주는 일러스트.
연필 한 자루 · 축 방향 단축법
- 형태·선
- 축 방향 단축법으로 연필을 구성한다. 화면 왼쪽 아래의 지우개 끝을 눈에 띄게 넓게 그리고 끝면을 보여준 뒤, 몸통의 긴 모서리들을 오른쪽 위의 흑연 끝을 향해 수렴시킨다. 화면에 투영된 몸통 길이를 줄여 깊이 방향으로 향하는 연필로 읽히게 하고, 금속 연결부와 몸통의 중심축을 일치시킨다.
- 색·명암
- 몸통에는 따뜻한 노랑, 지우개에는 차분한 분홍, 금속 연결부에는 차가운 회색을 사용한다. 화면 왼쪽 위에서 빛이 들어오게 하여 몸통의 왼쪽 위를 향한 면은 옅은 노랑으로, 오른쪽 아래를 향한 면은 황토색 명도로 칠한다. 지우개와 금속 연결부에도 같은 빛 방향을 넓고 단순한 음영으로 적용한다.
- 질감·재질
- 도장된 몸통은 매끈한 불투명 색면으로, 지우개는 부드러운 무광 표면으로 표현한다. 금속 연결부에는 곡면을 감싸는 넓은 밝은 띠 하나와 어두운 띠 하나를 넣는다. 먼 쪽 끝에서는 드러난 황갈색 나무와 짙은 흑연을 몇 개의 깔끔한 형태로 구분하고, 질감이 깊이 구성을 압도하지 않게 한다.
- 구도
- 큰 왼쪽 아래 끝으로 전경을, 작은 오른쪽 위 흑연 끝으로 먼 거리를 설정한다. 양 끝 주변에 배경 여백을 확보하고 가까운 지우개의 가장자리는 또렷하게, 먼 흑연 끝의 가장자리는 조금 차분하게 표현한다. 대각선 방향을 가리지 않아 크기 변화와 수렴하는 모서리가 함께 읽히게 한다.
우선순위
가까운 끝과 먼 끝의 크기 차이와 짧아진 투영 길이가 즉시 읽히게 한다.
피할 표현과 결과 확인
몸통 모서리가 평행하고 양 끝 크기가 같은 측면 연필을 피한다.
넓은 왼쪽 아래 지우개와 작은 오른쪽 위 흑연 끝이 뒤로 멀어지는 하나의 곧은 몸통으로 연결되는지 확인한다.
이 예시의 실제 생성 프롬프트
SUBJECT
Draw exactly one yellow hexagonal pencil with a pink eraser, a silver ferrule, and a sharpened graphite tip. Its eraser end points toward the viewer at image lower left; its graphite tip recedes toward image upper right. All parts connect along one straight axis.

COMPOSITION
Use a close three-quarter view along the pencil's length. Place the near eraser below and left of center and the distant tip above and right of center. Keep the entire pencil visible, with ample pale background around its diagonal silhouette.

STYLE GUIDE
1. Shape & line
Construct the pencil with axial foreshortening: make the lower-left eraser end visibly broad and show its end face, then converge the shaft's long edges toward the upper-right tip. Compress the projected shaft length so the pencil reads as pointing into depth; keep the ferrule and shaft centered on the same axis.

2. Color & light
Use warm yellow for the shaft, muted pink for the eraser, and cool gray for the ferrule. Light from image upper left, giving the shaft's upper-left-facing plane a pale yellow value and its lower-right-facing plane an ochre value. Carry this light direction through the eraser and ferrule with broad, simple shading.

3. Texture & material
Give the painted shaft smooth, opaque color and the eraser a soft matte surface. Describe the ferrule with one broad bright strip and one darker strip that wrap around its curved surface. At the distant tip, separate the exposed tan wood from the dark graphite with a few clean shapes, keeping texture subordinate to the depth construction.

4. Composition
Let the large lower-left end establish the foreground and the small upper-right tip establish the distance. Preserve clear background gaps around both ends, and use crisper edges at the near eraser with slightly quieter edges at the distant tip. Keep the diagonal unobstructed so the size change and converging edges can be read together.

PRIORITY
Preserve the requested identity, count, action, composition and output settings. Apply the style rules within those constraints; a style reference must not replace the subject or layout. Within the style: Make the near-to-far size change and shortened projected length immediately readable.

AVOID
Avoid a side-on pencil with parallel shaft edges and equally sized ends.

OUTPUT
Create one square illustration with no text, labels, measurements, watermark, or border.

SELF-CHECK
Check that the broad lower-left eraser and small upper-right tip connect through one straight, receding shaft.
모델명은 이미지 출처 정보 기준입니다. 같은 프롬프트를 사용해도 결과는 달라질 수 있습니다.