Text to imageSpace & architectureStyle guide
Small Rest Room · Anchoring with Contact Shadows
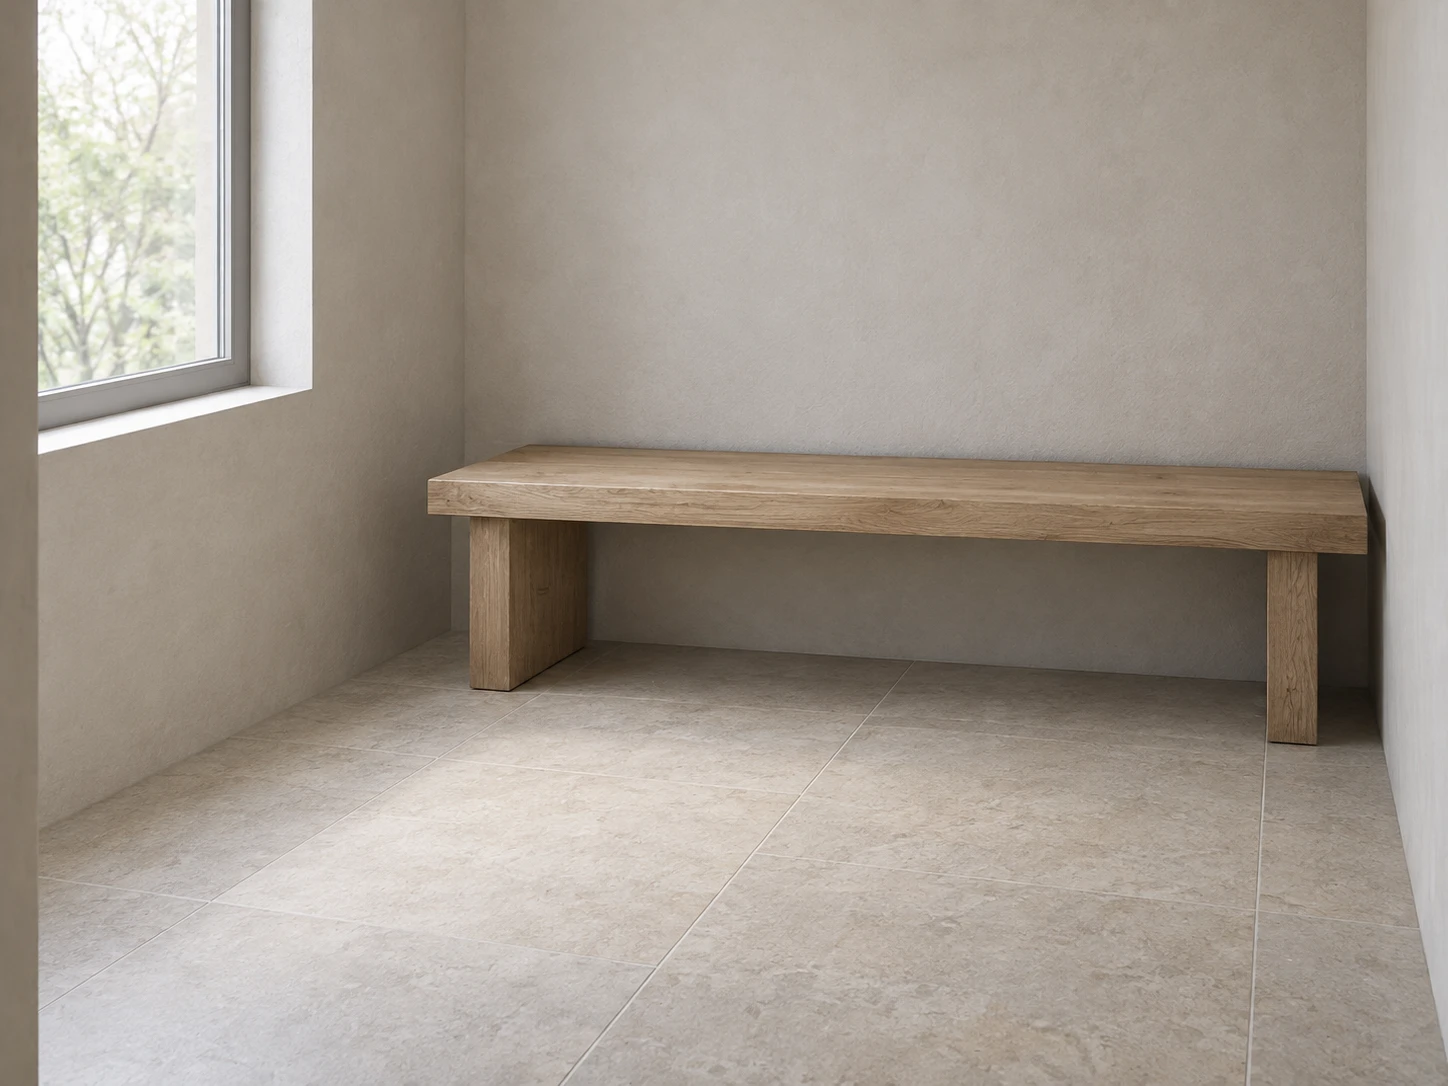
Narrow, soft shadows where a bench meets the wall and floor establish depth and weight within a diffusely lit room.
Small Rest Room · Anchoring with Contact Shadows
- Shape & line
- Build the bench from a thick rectangular seat and two simple slab supports, using consistent perspective. Let the rear seat edge visibly meet the back wall and both support bases visibly meet the floor; describe these junctions with shaded edges rather than heavy outlines.
- Color & light
- Use pale warm-gray walls, a muted oak bench, and a light stone-colored floor. Diffuse daylight enters from the image-left window: keep the left-facing surfaces gently brighter, then deepen the shade beneath the seat without creating a hard sunlight patch.
- Texture & material
- Keep plaster, wood, and flooring matte, with sparse broad grain marks on the seat. Add the darkest narrow shadow where the rear seat edge touches the wall and where each support touches the floor; soften and lighten each shadow as it spreads away from its contact.
- Composition
- Leave open floor in front of the bench and quiet wall space above it so the contact shading remains readable. Separate the broad, soft shade beneath the seat from the tighter shadows at the support bases, keeping every shadow attached to the junction that produces it.
Priority
Make the narrow contact shadows visibly anchor the bench to the wall and floor.
What to avoid & what to check
Avoid uniform black outlines, floating supports, and equally dark shading across open surfaces.
Confirm that the darkest shadows touch the bench junctions and soften outward.
Exact prompt for this example
SUBJECT
A small rest room containing one plain wooden bench against the back wall. Its solid seat rests on two rectangular supports that touch the floor; the rear seat edge meets the wall. A single broad window on the image-left wall supplies diffuse daylight.

COMPOSITION
View from the open entrance at seated eye level, angled slightly toward the back wall. Show the entire bench, both supports, the image-left window, and enough foreground floor to read the contact shadows. Keep the bench in the middle-right of the image.

STYLE GUIDE
1. Shape & line
Build the bench from a thick rectangular seat and two simple slab supports, using consistent perspective. Let the rear seat edge visibly meet the back wall and both support bases visibly meet the floor; describe these junctions with shaded edges rather than heavy outlines.

2. Color & light
Use pale warm-gray walls, a muted oak bench, and a light stone-colored floor. Diffuse daylight enters from the image-left window: keep the left-facing surfaces gently brighter, then deepen the shade beneath the seat without creating a hard sunlight patch.

3. Texture & material
Keep plaster, wood, and flooring matte, with sparse broad grain marks on the seat. Add the darkest narrow shadow where the rear seat edge touches the wall and where each support touches the floor; soften and lighten each shadow as it spreads away from its contact.

4. Composition
Leave open floor in front of the bench and quiet wall space above it so the contact shading remains readable. Separate the broad, soft shade beneath the seat from the tighter shadows at the support bases, keeping every shadow attached to the junction that produces it.

PRIORITY
Preserve the requested identity, count, action, composition and output settings. Apply the style rules within those constraints; a style reference must not replace the subject or layout. Within the style: Make the narrow contact shadows visibly anchor the bench to the wall and floor.

AVOID
Avoid uniform black outlines, floating supports, and equally dark shading across open surfaces.

OUTPUT
One landscape image in a 4:3 aspect ratio, rendered as a restrained architectural illustration, with no text, labels, logos, or watermark.

SELF-CHECK
Confirm that the darkest shadows touch the bench junctions and soften outward.
Model information comes from image provenance. The same prompt may produce a different result.