Text to imageCharacterStyle guide
Little Dragon · Integrated Horn Roots
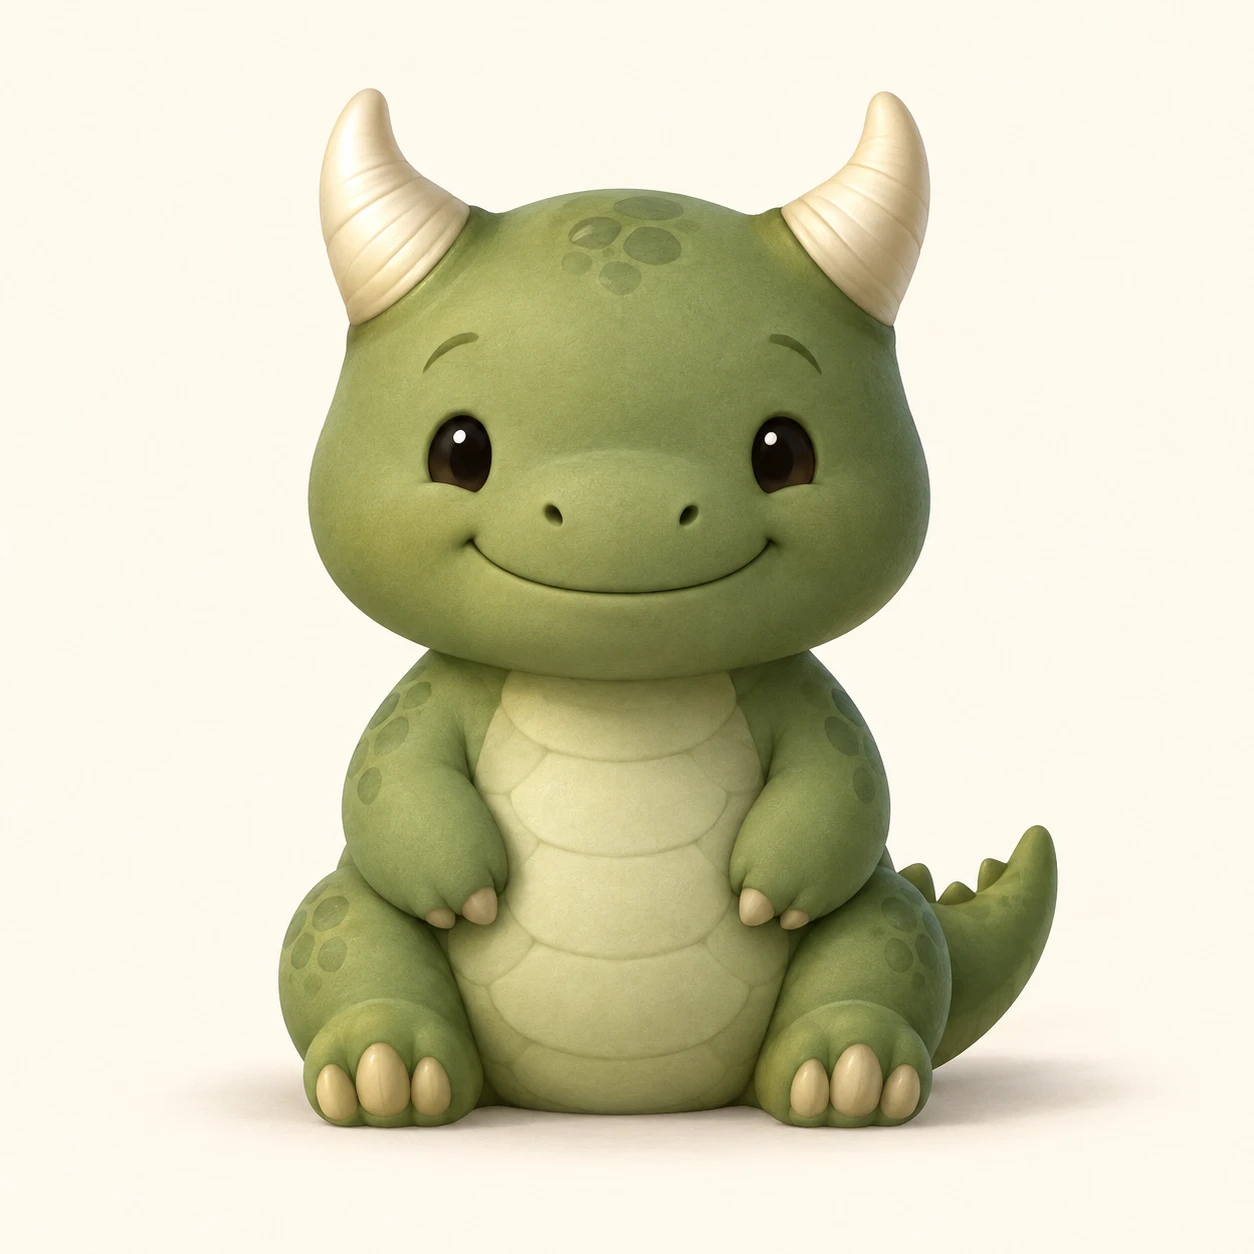
Give a little dragon naturally attached horns through broad roots and contours that flow into the head.
Little Dragon · Integrated Horn Roots
- Shape & line
- Draw each horn with a broad, gently flared root that narrows into a rounded tip. Let the head contour rise smoothly into the outer horn edge, and use a short curved boundary across the inner root to show where ivory meets skin; leave this boundary open at its ends so the horn feels embedded in the skull.
- Color & light
- Use muted moss-green skin and warm ivory horns under soft light from the upper image-left. Place a pale highlight along each horn's image-left face and a small soft shadow on the skin immediately image-right of its root, linking the raised horn to the head beneath it.
- Texture & material
- Render the skin as smooth matte material with a few broad scale patches on the belly. Give the horns a slightly satin surface with sparse shallow growth arcs that wrap around their widening bases; keep these marks lighter than the root boundary so texture does not obscure attachment.
- Composition
- Make the head large enough that both horn roots remain readable at thumbnail size. Separate the horns from each other with a visible crown of green skin, keep the arms beside the belly, and use a plain pale cream background with a soft ground shadow under the seated body.
Priority
Prioritize visibly rooted horns with broad bases that flow into the head.
What to avoid & what to check
Avoid floating horns, closed oval sockets, and dark texture that hides the roots.
Confirm that both horns widen into the skull and cast small shadows onto the adjacent skin.
Exact prompt for this example
SUBJECT
One original little dragon with a rounded head, two short ivory horns attached to the upper sides of its skull, small eyes, a closed smile, a plump body, and a short tail.

COMPOSITION
Use a straight-on, eye-level full-body view in a square frame. Center the seated dragon with clear space above both horns and around its feet; keep both horn roots fully visible.

STYLE GUIDE
1. Shape & line
Draw each horn with a broad, gently flared root that narrows into a rounded tip. Let the head contour rise smoothly into the outer horn edge, and use a short curved boundary across the inner root to show where ivory meets skin; leave this boundary open at its ends so the horn feels embedded in the skull.

2. Color & light
Use muted moss-green skin and warm ivory horns under soft light from the upper image-left. Place a pale highlight along each horn's image-left face and a small soft shadow on the skin immediately image-right of its root, linking the raised horn to the head beneath it.

3. Texture & material
Render the skin as smooth matte material with a few broad scale patches on the belly. Give the horns a slightly satin surface with sparse shallow growth arcs that wrap around their widening bases; keep these marks lighter than the root boundary so texture does not obscure attachment.

4. Composition
Make the head large enough that both horn roots remain readable at thumbnail size. Separate the horns from each other with a visible crown of green skin, keep the arms beside the belly, and use a plain pale cream background with a soft ground shadow under the seated body.

PRIORITY
Preserve the requested identity, count, action, composition and output settings. Apply the style rules within those constraints; a style reference must not replace the subject or layout. Within the style: Prioritize visibly rooted horns with broad bases that flow into the head.

AVOID
Avoid floating horns, closed oval sockets, and dark texture that hides the roots.

OUTPUT
Create one square character illustration with no lettering, captions, logos, or watermark.

SELF-CHECK
Confirm that both horns widen into the skull and cast small shadows onto the adjacent skin.
Model information comes from image provenance. The same prompt may produce a different result.