Text to imageSpace & architectureStyle guide
Small Lounge · Floor-Level Separation
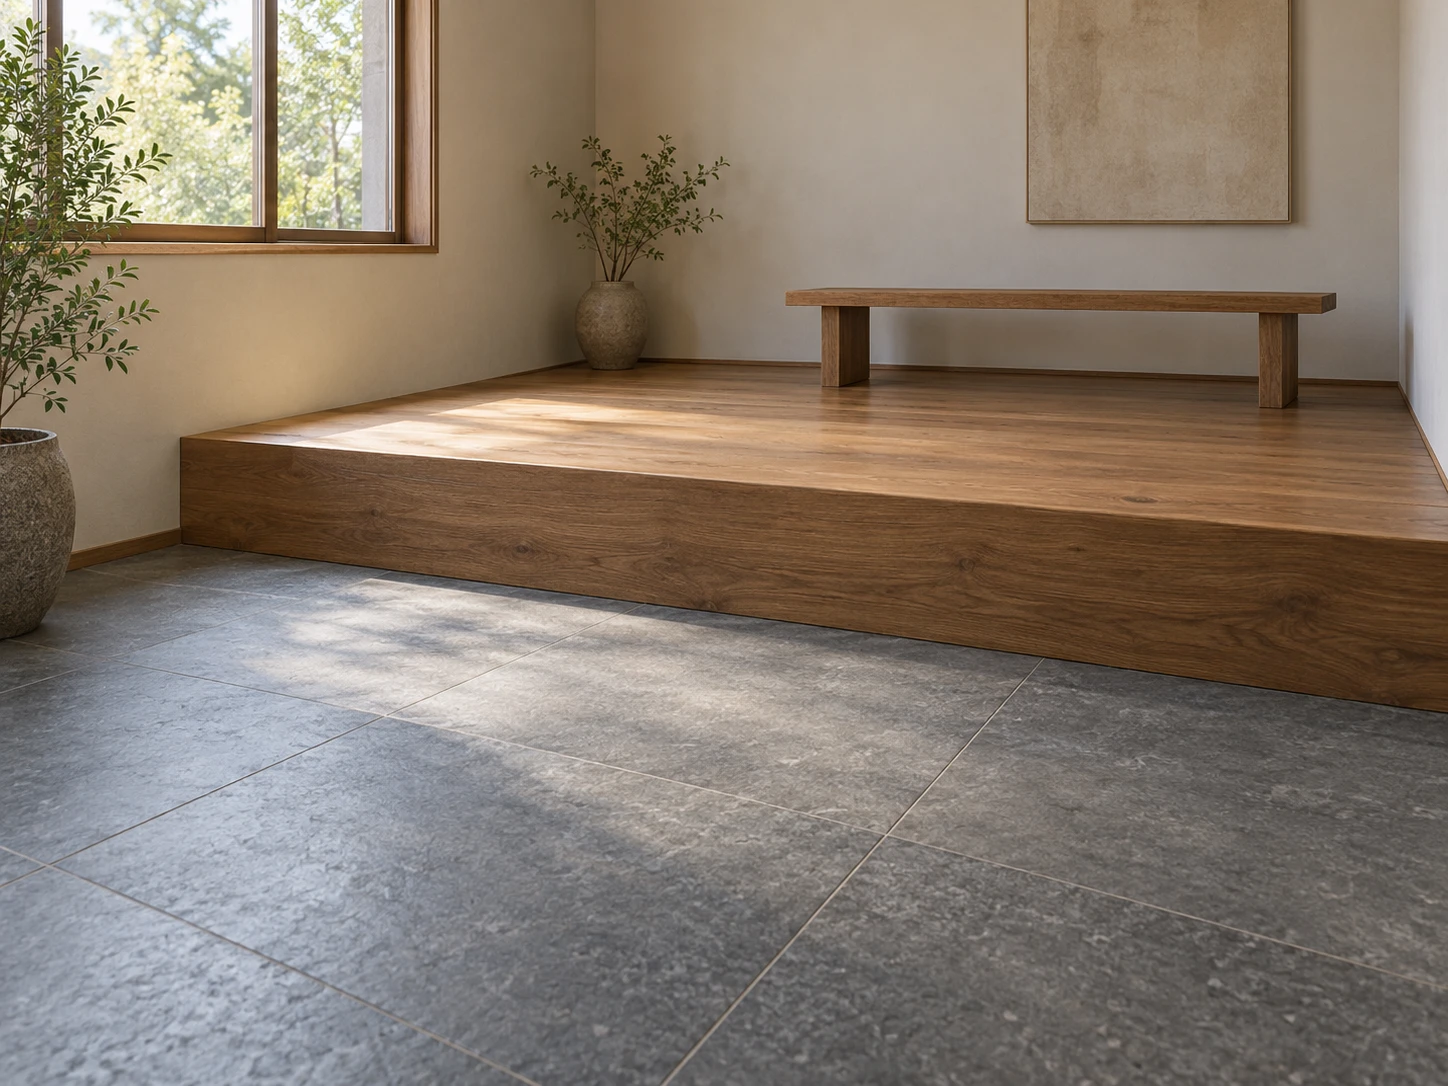
A lounge that makes two floor levels readable through an exposed platform face and clear overlap.
Small Lounge · Floor-Level Separation
- Shape & line
- Draw the platform top as a broad plane ending at a continuous front edge, then show a distinct vertical riser beneath it. Keep the bench feet visibly planted above that edge so the elevated floor reads as a solid volume.
- Color & light
- Let soft daylight enter from a window on the image-left wall, brightening the platform top while leaving its front riser darker. Add a narrow contact shadow where the riser meets the lower floor, without turning the entire foreground black.
- Texture & material
- Give the raised platform warm wood with broad, restrained grain, and give the lower floor cool matte stone with sparse joints. Carry the wood finish onto the riser so material continuity joins the platform’s top and front faces.
- Composition
- Keep a generous area of lower floor visible before the platform, and place the bench toward the image-right half of the raised area. Leave the platform’s front edge unobstructed so its thickness and the change in floor level remain easy to compare.
Priority
Make the exposed riser and the bench’s elevated contact points establish the level change first.
What to avoid & what to check
Avoid flattening the platform into a rug or hiding its front face behind furniture.
Check that the platform top, vertical riser, and lower floor are all separately visible.
Exact prompt for this example
SUBJECT
One small rectangular lounge containing one raised wooden platform across the rear third of the room and one simple backless bench resting entirely on that platform. The lower floor meets the platform’s exposed front riser; both levels belong to the same room.

COMPOSITION
Use a low, oblique view from the front-left corner, looking toward the rear-right corner. Show the lower floor in the foreground, the full platform front edge across the middle, and the bench beyond it. Include enough of both adjoining walls to establish the room.

STYLE GUIDE
1. Shape & line
Draw the platform top as a broad plane ending at a continuous front edge, then show a distinct vertical riser beneath it. Keep the bench feet visibly planted above that edge so the elevated floor reads as a solid volume.

2. Color & light
Let soft daylight enter from a window on the image-left wall, brightening the platform top while leaving its front riser darker. Add a narrow contact shadow where the riser meets the lower floor, without turning the entire foreground black.

3. Texture & material
Give the raised platform warm wood with broad, restrained grain, and give the lower floor cool matte stone with sparse joints. Carry the wood finish onto the riser so material continuity joins the platform’s top and front faces.

4. Composition
Keep a generous area of lower floor visible before the platform, and place the bench toward the image-right half of the raised area. Leave the platform’s front edge unobstructed so its thickness and the change in floor level remain easy to compare.

PRIORITY
Preserve the requested identity, count, action, composition and output settings. Apply the style rules within those constraints; a style reference must not replace the subject or layout. Within the style: Make the exposed riser and the bench’s elevated contact points establish the level change first.

AVOID
Avoid flattening the platform into a rug or hiding its front face behind furniture.

OUTPUT
One architectural interior image, landscape 4:3 aspect ratio, with no text, labels, dimensions, logos, or watermark.

SELF-CHECK
Check that the platform top, vertical riser, and lower floor are all separately visible.
Model information comes from image provenance. The same prompt may produce a different result.