Text to imageSpace & architectureStyle guide
Small Vestibule · Grazing Wall Light
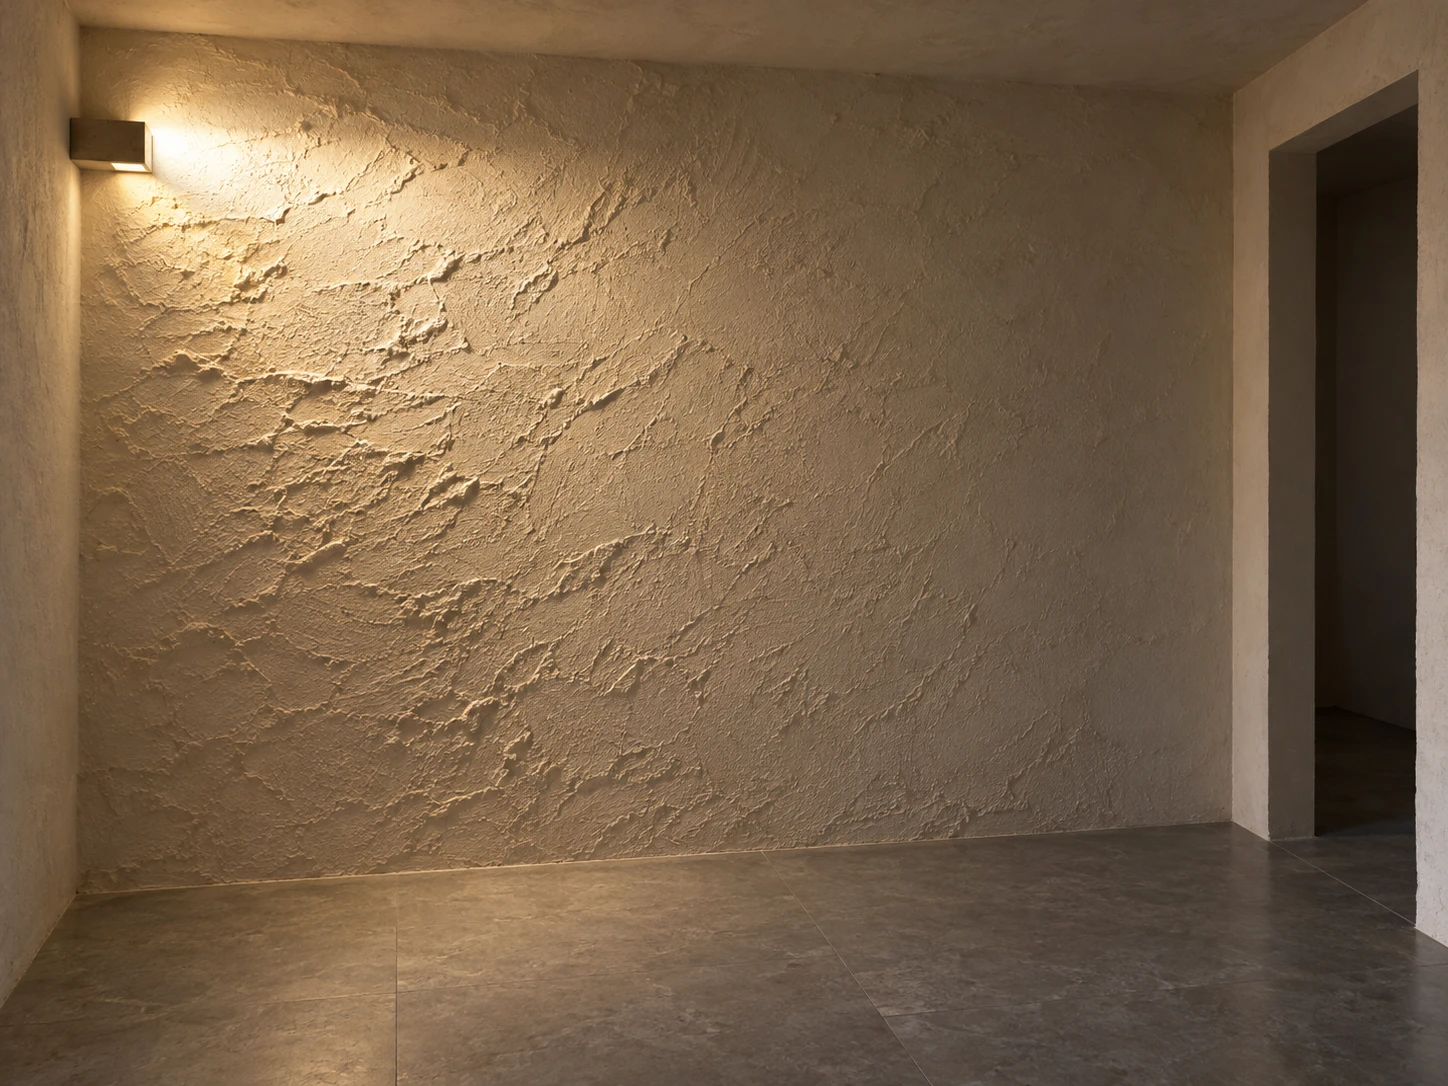
A spatial reference showing how light cast close along a wall reveals plaster relief and the depth of a small vestibule.
Small Vestibule · Grazing Wall Light
- Shape & line
- Construct the room with straight vertical corners and consistently receding floor edges; give the doorway a plain rectangular opening and the wall light a compact hood whose projecting edge makes its position against the wall clear.
- Color & light
- Use warm off-white plaster and a muted gray floor. Place the brightest warm light beside the fixture at upper image-left, then let it soften toward image-right; keep the doorway interior dim so the illuminated wall remains the visual focus.
- Texture & material
- Render the plaster as irregular shallow ridges and broad trowel marks. Where the light travels from image-left toward image-right, brighten the left-facing ridge edges and attach short shadows immediately to their right; reduce this relief contrast farther from the fixture and keep the stone floor comparatively smooth.
- Composition
- Keep the most legible relief in the left half of the back wall and leave quieter plaster toward the doorway at image-right. Show the wall-floor junction continuously across the frame, using the doorway and visible floor as secondary depth cues without interrupting the grazing-light demonstration.
Priority
Prioritize attached ridge shadows that visibly explain light grazing the wall from image-left.
What to avoid & what to check
Avoid frontal floodlighting, floating texture shadows, and uniformly sharp relief across the wall.
Check that illuminated left-facing ridges and their right-side shadows agree with the visible fixture position.
Exact prompt for this example
SUBJECT
Show one small vestibule with a rough plaster back wall, a smooth stone floor, and one compact wall light mounted near the upper image-left end of the back wall. Its concealed source directs light rightward along that same wall, revealing shallow plaster relief. An open doorway in the image-right side wall establishes the room's depth.

COMPOSITION
Use an eye-level oblique view from the entrance. Let the plaster back wall occupy most of the frame, with a narrow strip of the image-right side wall and enough floor to show their junctions. Keep the light fixture, illuminated wall texture, and open doorway clearly readable.

STYLE GUIDE
1. Shape & line
Construct the room with straight vertical corners and consistently receding floor edges; give the doorway a plain rectangular opening and the wall light a compact hood whose projecting edge makes its position against the wall clear.

2. Color & light
Use warm off-white plaster and a muted gray floor. Place the brightest warm light beside the fixture at upper image-left, then let it soften toward image-right; keep the doorway interior dim so the illuminated wall remains the visual focus.

3. Texture & material
Render the plaster as irregular shallow ridges and broad trowel marks. Where the light travels from image-left toward image-right, brighten the left-facing ridge edges and attach short shadows immediately to their right; reduce this relief contrast farther from the fixture and keep the stone floor comparatively smooth.

4. Composition
Keep the most legible relief in the left half of the back wall and leave quieter plaster toward the doorway at image-right. Show the wall-floor junction continuously across the frame, using the doorway and visible floor as secondary depth cues without interrupting the grazing-light demonstration.

PRIORITY
Preserve the requested identity, count, action, composition and output settings. Apply the style rules within those constraints; a style reference must not replace the subject or layout. Within the style: Prioritize attached ridge shadows that visibly explain light grazing the wall from image-left.

AVOID
Avoid frontal floodlighting, floating texture shadows, and uniformly sharp relief across the wall.

OUTPUT
Create one architectural interior reference image in a 4:3 landscape aspect ratio, with no captions, lettering, logos, or watermarks.

SELF-CHECK
Check that illuminated left-facing ridges and their right-side shadows agree with the visible fixture position.
Model information comes from image provenance. The same prompt may produce a different result.