Text to imageSpace & architectureStyle guide
Small Workroom · Vertical Line Correction
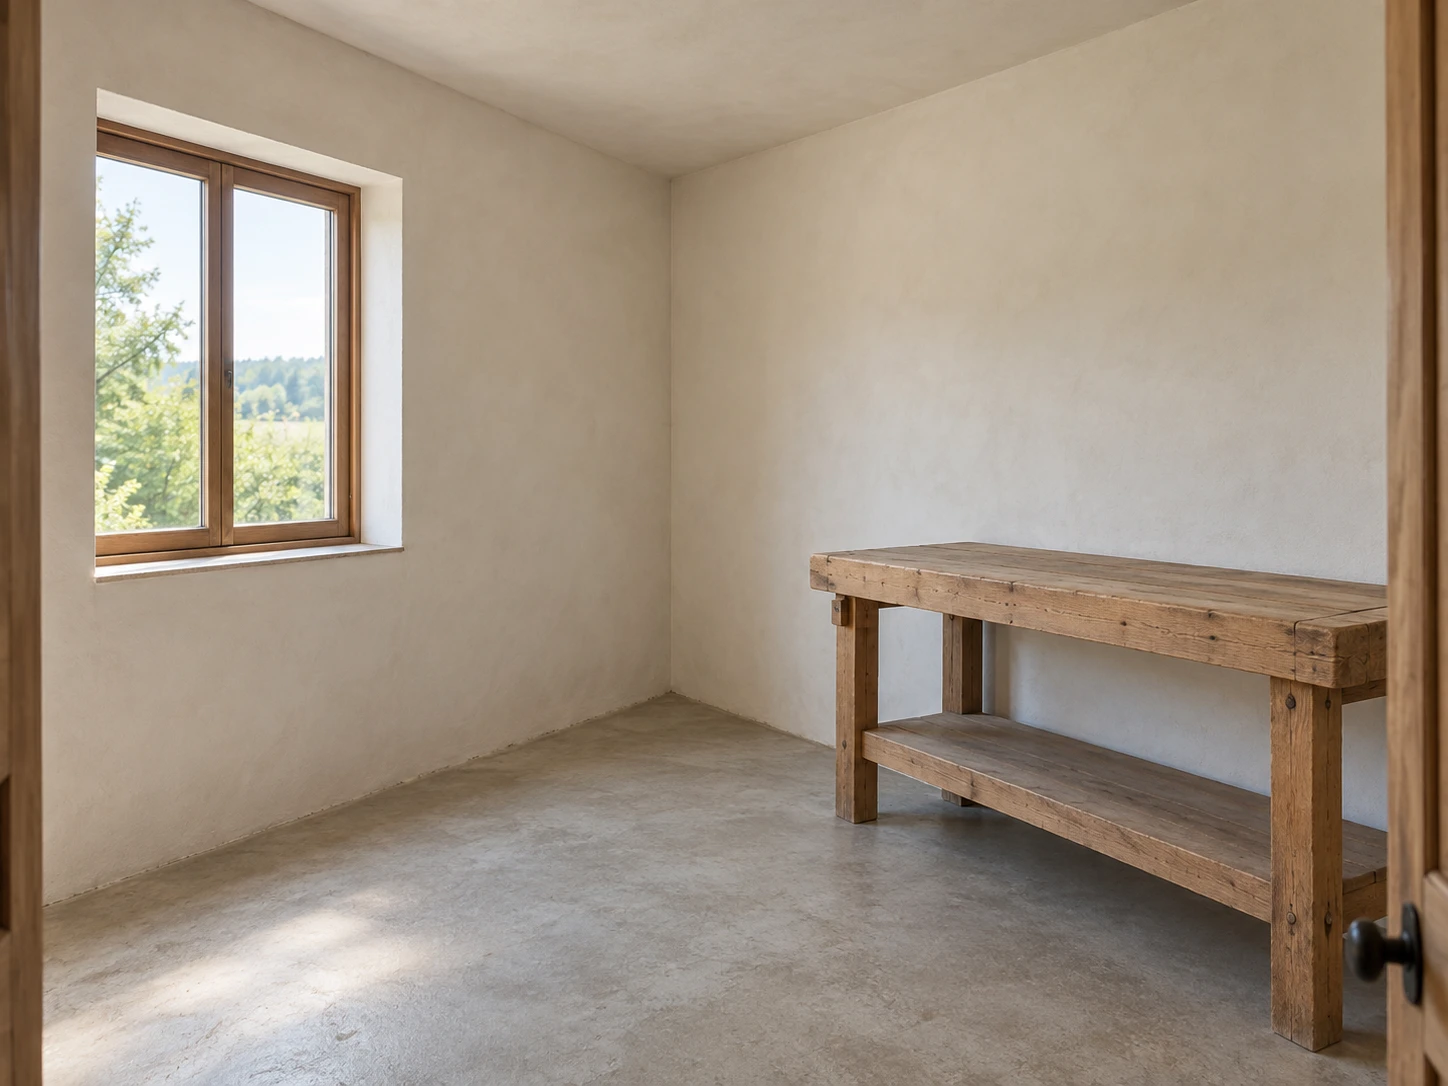
An architectural photography reference that keeps wall corners and window jambs parallel to show a small workroom’s height and structure clearly.
Small Workroom · Vertical Line Correction
- Shape & line
- Correct vertical convergence so the rear wall corner, window jambs, and workbench legs remain straight and parallel to the image’s vertical edges; let horizontal wall and furniture edges recede naturally to establish room depth.
- Color & light
- Bring soft daylight through the image-left window, making the adjacent wall and left-facing workbench surfaces brighter while the image-right underside stays shaded; use pale warm walls, muted wood, and neutral shadows with visible detail.
- Texture & material
- Render plaster with restrained matte variation and the workbench with broad, readable wood grain; keep window-frame edges crisp and preserve natural surface detail without making the walls look polished or heavily distressed.
- Composition
- Keep the camera view level and use a moderate wide framing that includes both floor and ceiling without stretching the corners; leave clear wall space beside the window so its parallel vertical jambs are easy to compare with the rear wall corner.
Priority
Prioritize parallel architectural verticals while preserving believable room depth.
What to avoid & what to check
Avoid leaning walls, bowed edges, and exaggerated wide-angle stretching.
Check that the wall corner and both window jambs stay parallel to the image sides.
Exact prompt for this example
SUBJECT
One small rectangular workroom with pale plaster walls, one rectangular window on the image-left wall, and one simple wooden workbench against the image-right wall. Show the junction of the two walls, the floor, and the ceiling.

COMPOSITION
View the room diagonally from its entrance at standing eye height. Place the rear wall corner slightly left of image center, retain comfortable margins above the window and around the workbench, and show enough floor to establish depth.

STYLE GUIDE
1. Shape & line
Correct vertical convergence so the rear wall corner, window jambs, and workbench legs remain straight and parallel to the image’s vertical edges; let horizontal wall and furniture edges recede naturally to establish room depth.

2. Color & light
Bring soft daylight through the image-left window, making the adjacent wall and left-facing workbench surfaces brighter while the image-right underside stays shaded; use pale warm walls, muted wood, and neutral shadows with visible detail.

3. Texture & material
Render plaster with restrained matte variation and the workbench with broad, readable wood grain; keep window-frame edges crisp and preserve natural surface detail without making the walls look polished or heavily distressed.

4. Composition
Keep the camera view level and use a moderate wide framing that includes both floor and ceiling without stretching the corners; leave clear wall space beside the window so its parallel vertical jambs are easy to compare with the rear wall corner.

PRIORITY
Preserve the requested identity, count, action, composition and output settings. Apply the style rules within those constraints; a style reference must not replace the subject or layout. Within the style: Prioritize parallel architectural verticals while preserving believable room depth.

AVOID
Avoid leaning walls, bowed edges, and exaggerated wide-angle stretching.

OUTPUT
Create one landscape 4:3 architectural photograph with no text, labels, logos, or watermark.

SELF-CHECK
Check that the wall corner and both window jambs stay parallel to the image sides.
Model information comes from image provenance. The same prompt may produce a different result.