Text to imageLandscapeStyle guide
Small Tidal Flat · Merging Channels
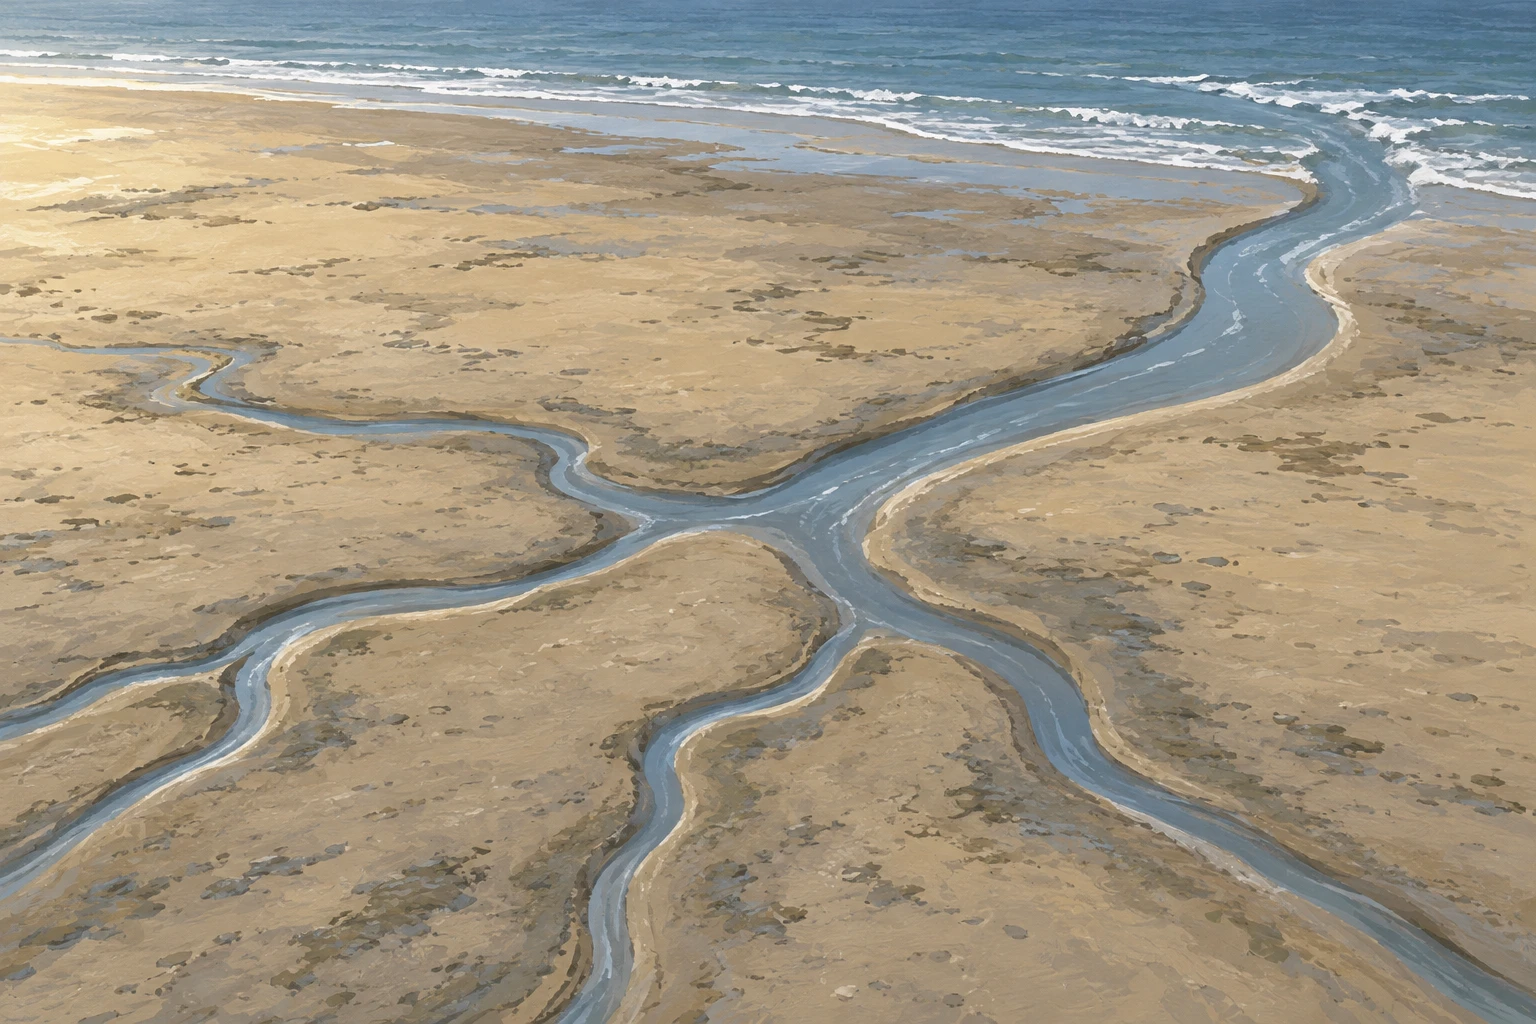
Show flow and depth across a flat tidal shore by merging fine tributaries into one wider channel.
Small Tidal Flat · Merging Channels
- Shape & line
- Draw narrow, gently winding tributaries entering from the lower left and lower center, merging at acute Y-shaped junctions into a broader channel toward the upper right. Continue each joining groove into the receiving channel without crossing lines or closing the junction.
- Color & light
- Paint the exposed sand in muted warm beige and the shallow channel water in cool gray-blue. With light arriving from the image's upper left, place a slim pale edge on the lower-right bank of selected grooves and a darker inner edge beneath their upper-left banks to reveal shallow depressions.
- Texture & material
- Use matte, opaque gouache strokes for the sand, adding sparse broken horizontal marks on the exposed surface. Keep the channel interiors smoother, with a few elongated pale reflections following the water's bends; let the damp sand immediately beside the grooves form darker, irregular margins.
- Composition
- Place the largest Y-shaped confluence just below the image center, leaving open sand between its branches. Carry the main channel diagonally to a visibly open mouth in the upper-right sea strip, and reduce subsidiary marks toward that strip so the viewer can trace the network at a glance.
Priority
Make the continuous tributary-to-main-channel connections the clearest feature.
What to avoid & what to check
Avoid disconnected decorative veins, crossing channels, and canyon-like banks.
Check that every tributary visibly joins the main channel and that its mouth opens into the sea.
Exact prompt for this example
SUBJECT
One small exposed tidal flat with several shallow drainage tributaries joining one main channel that opens into the sea at the upper right.

COMPOSITION
Use an elevated oblique view in a horizontal frame. Let the tidal flat fill the lower two-thirds, with a narrow sea strip above it; keep the complete branching channel network readable.

STYLE GUIDE
1. Shape & line
Draw narrow, gently winding tributaries entering from the lower left and lower center, merging at acute Y-shaped junctions into a broader channel toward the upper right. Continue each joining groove into the receiving channel without crossing lines or closing the junction.

2. Color & light
Paint the exposed sand in muted warm beige and the shallow channel water in cool gray-blue. With light arriving from the image's upper left, place a slim pale edge on the lower-right bank of selected grooves and a darker inner edge beneath their upper-left banks to reveal shallow depressions.

3. Texture & material
Use matte, opaque gouache strokes for the sand, adding sparse broken horizontal marks on the exposed surface. Keep the channel interiors smoother, with a few elongated pale reflections following the water's bends; let the damp sand immediately beside the grooves form darker, irregular margins.

4. Composition
Place the largest Y-shaped confluence just below the image center, leaving open sand between its branches. Carry the main channel diagonally to a visibly open mouth in the upper-right sea strip, and reduce subsidiary marks toward that strip so the viewer can trace the network at a glance.

PRIORITY
Preserve the requested identity, count, action, composition and output settings. Apply the style rules within those constraints; a style reference must not replace the subject or layout. Within the style: Make the continuous tributary-to-main-channel connections the clearest feature.

AVOID
Avoid disconnected decorative veins, crossing channels, and canyon-like banks.

OUTPUT
Create one landscape-format 3:2 gouache illustration without lettering, labels, borders, or watermarks.

SELF-CHECK
Check that every tributary visibly joins the main channel and that its mouth opens into the sea.
Model information comes from image provenance. The same prompt may produce a different result.