Text to imageSpace & architectureStyle guide
Small Waiting Room · Corner-Wrapping Color Band
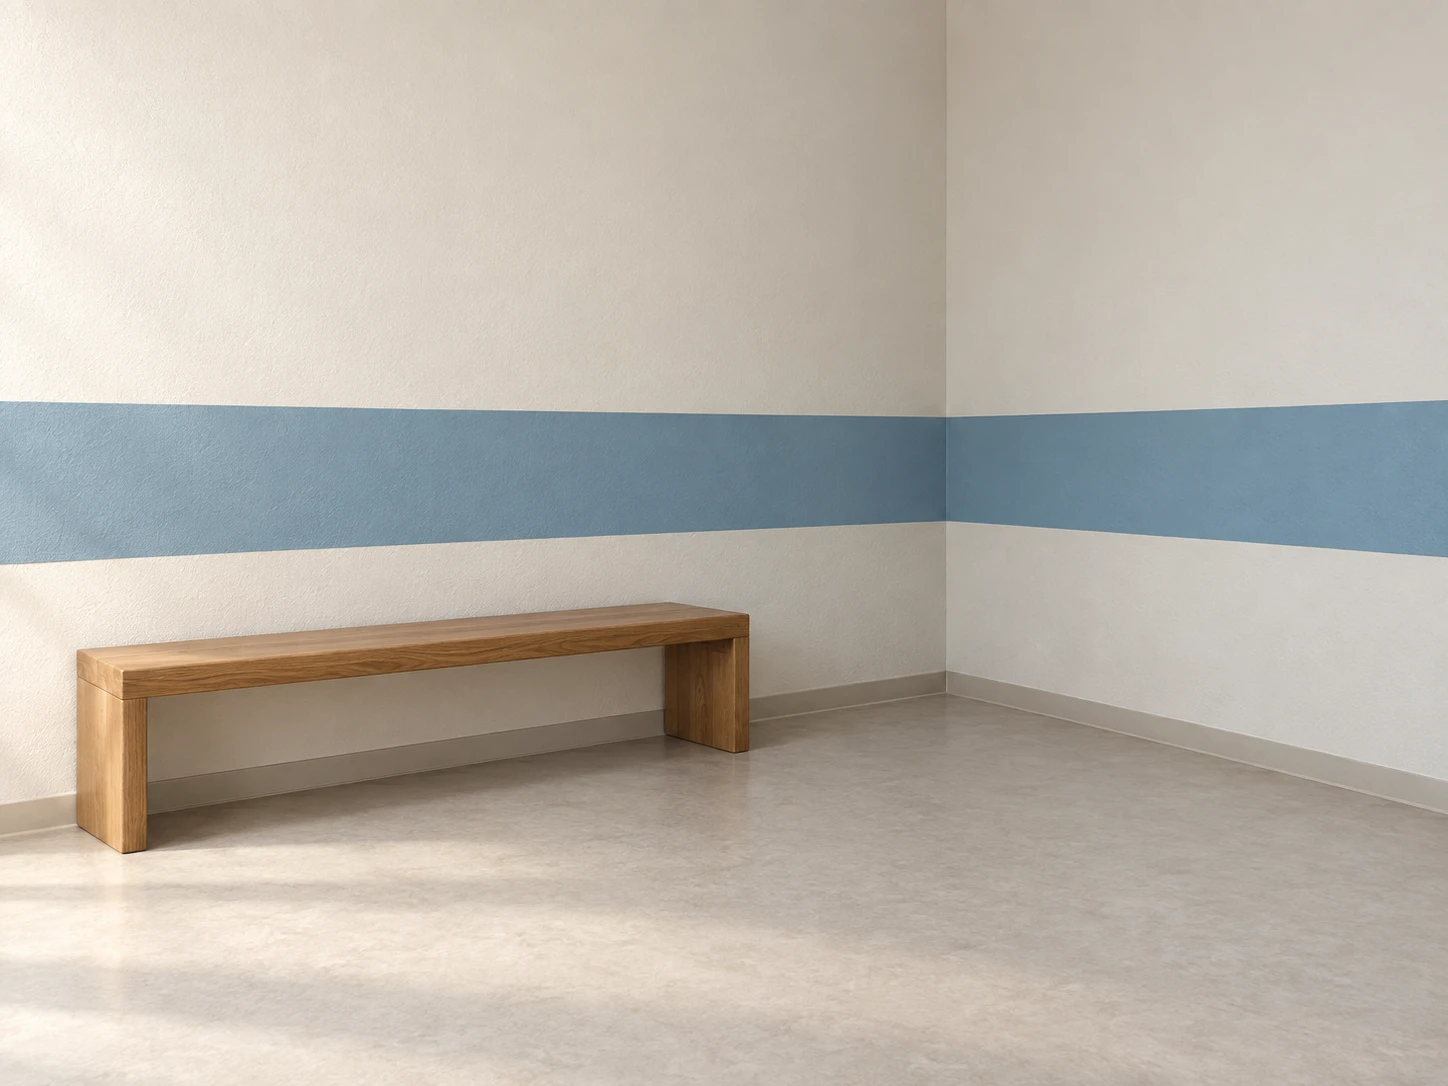
A continuous painted band wraps around two adjoining walls to reveal the orientation and depth of a small waiting room.
Small Waiting Room · Corner-Wrapping Color Band
- Shape & line
- Draw the two walls as distinct planes meeting at one crisp vertical corner. Carry the upper and lower edges of the painted band into that same corner without a gap or height jump; each edge changes direction there and follows its wall's perspective toward the corresponding vanishing point.
- Color & light
- Use warm off-white walls and one muted blue band. Let soft daylight from image-left make the left wall gently brighter and the right wall slightly darker, shifting the band's value with each wall while keeping its blue hue recognizable across the corner.
- Texture & material
- Render the walls and band as matte paint with restrained plaster grain, keeping the painted boundaries clean. Give the bench broad, subtle wood grain and a soft contact shadow beneath its feet; keep surface detail quieter than the continuous band edges.
- Composition
- Keep the entire corner junction and a generous stretch of the band visible on both image sides. Place the bench low on image-left with its long axis following that wall, and leave open floor in the foreground so the band reads as a wrap around room surfaces.
Priority
Prioritize the uninterrupted turn of the painted band across the inside corner.
What to avoid & what to check
Avoid a floating ribbon, mismatched band heights, or a front-facing stripe that ignores wall perspective.
Check that both band edges meet at the corner and recede consistently along their respective walls.
Exact prompt for this example
SUBJECT
One small waiting room with two adjoining plaster walls, a pale floor, and one simple wooden bench against the image-left wall. A muted blue painted band crosses both walls at a consistent height above the floor and joins continuously at their shared inside corner.

COMPOSITION
Use an eye-level oblique view showing the inside corner slightly right of center, both wall planes, and enough floor to establish depth. The image-left wall occupies more width than the image-right wall. Keep the bench below the painted band so its continuity remains visible.

STYLE GUIDE
1. Shape & line
Draw the two walls as distinct planes meeting at one crisp vertical corner. Carry the upper and lower edges of the painted band into that same corner without a gap or height jump; each edge changes direction there and follows its wall's perspective toward the corresponding vanishing point.

2. Color & light
Use warm off-white walls and one muted blue band. Let soft daylight from image-left make the left wall gently brighter and the right wall slightly darker, shifting the band's value with each wall while keeping its blue hue recognizable across the corner.

3. Texture & material
Render the walls and band as matte paint with restrained plaster grain, keeping the painted boundaries clean. Give the bench broad, subtle wood grain and a soft contact shadow beneath its feet; keep surface detail quieter than the continuous band edges.

4. Composition
Keep the entire corner junction and a generous stretch of the band visible on both image sides. Place the bench low on image-left with its long axis following that wall, and leave open floor in the foreground so the band reads as a wrap around room surfaces.

PRIORITY
Preserve the requested identity, count, action, composition and output settings. Apply the style rules within those constraints; a style reference must not replace the subject or layout. Within the style: Prioritize the uninterrupted turn of the painted band across the inside corner.

AVOID
Avoid a floating ribbon, mismatched band heights, or a front-facing stripe that ignores wall perspective.

OUTPUT
Create one architectural interior illustration in a 4:3 landscape aspect ratio, with no text, labels, logos, or watermark.

SELF-CHECK
Check that both band edges meet at the corner and recede consistently along their respective walls.
Model information comes from image provenance. The same prompt may produce a different result.